
Tight leather shoes are one of the most frustrating footwear problems — and one of the most fixable. Whether you bought a pair that’s slightly too snug, or your shoes have tightened up over time, there are several safe and effective ways to stretch them at home without spending money at a cobbler. This guide covers every method, from the simplest to the most targeted, so you can find comfortable relief fast.
How Much Can Leather Shoes Actually Be Stretched?
Real leather is naturally flexible and responsive to stretching — one of the reasons it’s such a superior material for footwear. Depending on the grade and thickness of the leather, most shoes can be stretched by a half size to a full size in length and width with the right methods.
That said, stretching has limits. If a shoe is two or more sizes too small, no home method will make it comfortable. Stretching works best when the shoe is close to the right size but just slightly too tight — a common situation with new leather shoes that haven’t broken in yet, or shoes that have stiffened after a period without wear.
Method 1 — The Thick Sock and Wear Method
Thick Socks and Body Heat
✔ Easiest — Zero Equipment NeededThis is the simplest stretching method and the one to try first. Put on the thickest pair of socks you own — wool hiking socks or doubled-up cotton socks both work well — and then put on your tight leather shoes. The extra bulk of the thick socks pushes outward against the leather in all directions simultaneously, gently stretching it while you move around.
Walk around the house in them for 20 to 30 minutes. The combination of body heat from your foot, the pressure of the thick socks, and the natural flex of the leather as you walk softens and stretches the shoe gradually. Repeat daily for three to five days and most slightly tight shoes will loosen noticeably.
Method 2 — The Hairdryer and Thick Sock Method
Hairdryer Heat Stretching
✔ Easy — Fast ResultsHeat softens leather quickly and makes it much more pliable. This method uses a hairdryer to warm specific tight areas while wearing thick socks, encouraging the leather to stretch around your foot shape as it cools.
- Put on the thickest socks you have and lace up the shoes normally.
- Set your hairdryer to medium heat — never high, as excessive heat dries and cracks leather.
- Hold the hairdryer 15 to 20 centimetres (6 to 8 inches) from the tight area and move it back and forth continuously. Never hold it in one spot. Heat each tight area for 20 to 30 seconds.
- While the leather is warm, flex your foot — curl your toes, bend your foot up and down, and move as naturally as possible. This movement shapes the softened leather around your foot.
- Keep the shoes on until the leather has cooled completely. This sets the leather in its new, slightly stretched shape.
- Apply leather conditioner to the heated areas immediately after to replace the moisture the heat removed.
Repeat once or twice if needed — but always condition between sessions and allow at least 24 hours between heat applications.
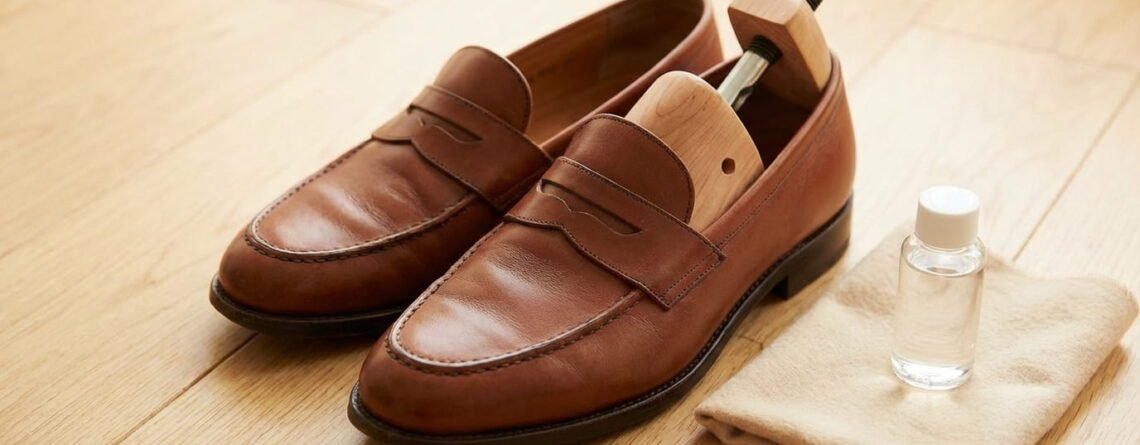
Method 3 — Shoe Stretcher
Wooden or Plastic Shoe Stretcher
✔ Easy — Most Precise ResultsA shoe stretcher is a foot-shaped tool — usually made from beechwood or plastic — that is inserted into the shoe and expanded to push the leather outward. It’s the most controlled and consistent stretching method available at home and the closest result to what a professional cobbler achieves.
- Apply a small amount of leather conditioner or a dedicated shoe stretch spray to the inside of the tight areas. This softens the leather and makes it more receptive to stretching.
- Insert the shoe stretcher into the shoe and turn the handle or knob to expand it until you feel resistance — not force. You should feel the stretcher pushing firmly against the leather but not straining it.
- Leave the stretcher in place for six to eight hours — overnight works perfectly. For significant tightness, leave it for 24 to 48 hours.
- Remove the stretcher and try the shoe on. If it still feels tight, repeat with the stretcher expanded slightly more.
- Apply leather conditioner to the stretched areas after removing the stretcher.
Two-way stretchers expand both lengthways and widthways simultaneously. Width-only stretchers are useful when the shoe is the right length but too narrow. Many stretchers also come with spot-stretching plugs — small pegs that attach to the stretcher and target a very specific pressure point like a bunion area or a tight seam.
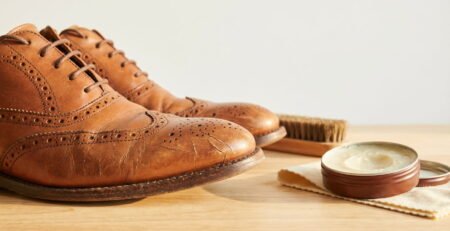
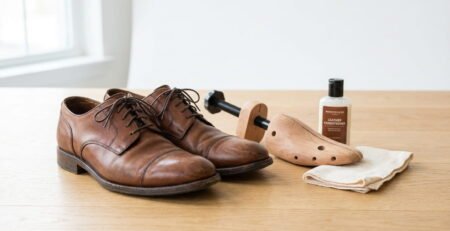
Method 4 — Leather Conditioner and Wear
Deep Conditioning Before Wearing
✔ Easy — Gentlest MethodLeather conditioner softens leather fibers by restoring their natural oils and moisture. Applied generously to tight areas before wearing, it makes the leather significantly more pliable — and when you then put the shoes on and walk around, the softened leather molds more readily to your foot.
- Apply a generous coat of leather conditioner to the outside of the shoe — focusing on the toe box, sides, and heel counter.
- Work it in thoroughly with a cloth using circular motions and let it absorb for 15 to 20 minutes.
- Put on thick socks and wear the shoes for 30 to 60 minutes while the leather is at its most supple.
- Remove the shoes and insert shoe trees to hold the stretched shape as the leather dries and sets.
- Repeat every day or two until the desired comfort level is reached.
This is the gentlest stretching method and the safest for all leather types including suede — just use a suede-specific conditioner rather than a standard leather conditioner for napped leathers.
Method 5 — Shoe Stretch Spray
Commercial Shoe Stretch Spray
✔ Easy — Widely AvailableShoe stretch sprays are commercially formulated liquids that soften leather quickly and make it more responsive to stretching. They’re available in most shoe shops and online, and they work faster than conditioner alone. Many are also formulated specifically for suede and nubuck, making them a safer option for those materials than heat-based methods.
- Spray the inside and outside of the tight areas of the shoe until the leather is lightly damp — not soaking wet.
- Immediately put on thick socks and wear the shoes, or insert a shoe stretcher if you prefer not to wear them.
- Walk around in the shoes for 20 to 30 minutes while the spray is still active, flexing your feet naturally.
- Remove and allow to dry completely at room temperature — never with direct heat.
- Apply leather conditioner once fully dry to replenish the leather’s moisture.
Method 6 — The Freezer Method
Water and Freezer Stretching
● Medium — Use With CareWater expands when it freezes. This method uses that expansion to push leather outward from the inside. It’s a popular home remedy and can be effective — but it carries more risk than other methods if done incorrectly, as water can stain or damage leather if applied too liberally.
- Fill two zip-lock sandwich bags about one-third full with water and seal them tightly, removing as much air as possible.
- Place one bag inside each shoe, positioning them in the tightest area — usually the toe box.
- Place the shoes in the freezer and leave overnight. The water will freeze and expand, gradually pushing the leather outward.
- Remove the shoes from the freezer and let the ice thaw for 20 to 30 minutes before attempting to remove the bags. Pulling frozen bags out forcefully can distort the shoe shape.
- Try the shoes on. Repeat if needed with the bags slightly fuller — no more than half full to avoid overstretching.
- Condition the leather after the process to restore moisture.
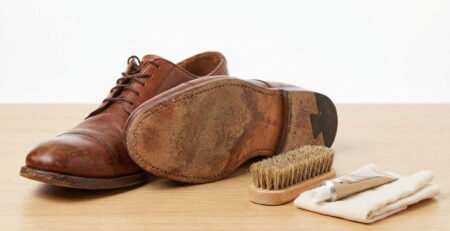
Method 7 — Rolled Newspaper or Socks Stuffing
Newspaper or Fabric Stuffing
✔ Easy — No Equipment NeededA simple low-tech method that works well for gentle, gradual stretching overnight. Stuff the shoes as firmly as possible with tightly rolled newspaper or tightly balled-up socks, packing the toe box and sides until the leather is visibly pushing outward. Leave overnight or for several hours. The sustained outward pressure gradually stretches the leather without any heat or moisture.
This method works best as a supplement to other methods rather than a standalone solution for significantly tight shoes — but for mild tightness or ongoing maintenance stretching, it’s a reliable everyday tool that costs nothing.
Stretching Specific Problem Areas
Stretching the Toe Box
The toe box is the most commonly tight area in leather shoes. Use a two-way shoe stretcher with the length and width expansion set to push outward at the toe. Alternatively, the freezer method with bags positioned specifically in the toe box targets this area well. The hairdryer method also works on toe box tightness — warm the outside of the toe box while curling and uncurling your toes inside the shoe to encourage the leather to expand at the front.
Stretching the Width
Width tightness — pressure across the ball of the foot and sides of the shoe — responds best to a width-specific shoe stretcher. Two-way stretchers allow independent width adjustment. Spot-stretching plugs on the stretcher can target bunion areas or specific pressure points on the side of the foot. The thick sock method also helps with width — the sock pushes outward in all directions including across the widest part of the foot.
Stretching the Heel Counter
A tight heel counter that rubs and causes blisters can be softened using the spoon trick — rub a smooth metal spoon firmly along the inside of the heel counter for 60 seconds to warm and soften the leather in that specific spot. Applying conditioner directly to the inside of the heel counter and then wearing the shoe also softens this area effectively. A heel stretcher attachment on a shoe stretcher can expand the heel cup slightly if it’s too narrow for your heel shape.
Stretching the Instep
If the tongue of the shoe presses uncomfortably on the top of your foot — a high instep issue — loosen the laces as much as possible during early break-in sessions. Apply conditioner to the tongue area to soften it. Some shoe stretchers have a ball-and-ring attachment that can raise the instep area specifically. Switching to a Derby shoe rather than an Oxford also helps, as the open lacing allows more instep room.
Quick Comparison — Which Method to Use When
| Method | Best For | Time Needed | Safe for Suede? |
|---|---|---|---|
| Thick socks and wear | General all-over tightness | 30 min daily for several days | Yes |
| Hairdryer and socks | Targeted tight spots — fast results | 20 to 30 minutes per session | No — avoid on suede |
| Shoe stretcher | Width and toe box — most precise | 6 to 48 hours overnight | Yes — with stretch spray |
| Leather conditioner | Gentle softening — all leather types | Ongoing — repeated sessions | Yes — use suede conditioner |
| Stretch spray | Fast softening before wearing or stretching | 20 to 30 minutes per session | Yes — check label |
| Freezer method | Toe box — no stretcher available | Overnight | No — never use on suede |
| Newspaper stuffing | Mild tightness — maintenance | Overnight | Yes |
When to See a Cobbler Instead
Most mild to moderate tightness can be fixed at home with the methods above. But there are situations where a professional cobbler is the smarter call. If the shoe is more than a full size too small, home stretching won’t be enough. If the shoe is made from exotic leather — crocodile, ostrich, or stingray — professional handling is safer. If previous stretching attempts have left the leather looking stressed or wrinkled in unusual ways, stop and take the shoes to a cobbler before doing more damage.
A cobbler has professional stretching machines, specialist compounds, and the experience to stretch leather significantly without distorting the shoe’s shape. The cost is usually very reasonable — far cheaper than replacing a quality pair of shoes that just need a little more room.
✔ Safe Stretching Habits
- Always condition leather after any stretching session
- Start with gentle methods and escalate only if needed
- Use shoe trees after stretching to hold the new shape
- Test on a small hidden area before using new products
- Stretch gradually over several sessions rather than all at once
- Use suede-safe methods on napped leather
- Allow 24 hours between heat-based stretching sessions
✘ Things That Damage Leather
- Soaking leather in water to stretch it
- Using a hairdryer on suede or patent leather
- Overfilling freezer bags causing cracks from over-expansion
- Forcing a shoe stretcher beyond firm resistance
- Skipping conditioner after heat or chemical stretching
- Trying to stretch shoes two or more sizes too small
- Using rubbing alcohol directly on leather — it dries it out severely
Frequently Asked Questions
How much can you stretch leather shoes at home?
Most genuine leather shoes can be safely stretched by a half size to a full size using home methods. Width stretching of 3mm to 6mm is achievable with a good shoe stretcher and stretch spray. Length stretching is more limited — shoe stretchers can add a small amount of length but are most effective for width. If you need more than a full size of stretch, a professional cobbler with a stretching machine can typically achieve more without damaging the shoe. Synthetic and bonded leather materials stretch very little and risk cracking under pressure.
Does stretching leather shoes damage them?
Done correctly and gradually, stretching does not damage quality leather shoes. Leather is a flexible natural material designed to mold and adapt — controlled stretching works with its natural properties rather than against them. The risk of damage comes from aggressive or improper methods — excessive heat, over-expanding a stretcher beyond the leather’s tolerance, or using water on suede. Following the methods in this guide carefully and always conditioning the leather after stretching keeps the shoes in good condition throughout the process.
Can a cobbler stretch leather shoes more than home methods?
Yes — significantly. Professional cobblers have hydraulic and mechanical stretching machines that apply much more even and controlled force than any home device. They also use professional-grade stretching compounds that penetrate and soften leather more deeply than consumer products. A cobbler can typically stretch a shoe one to two full sizes in width and add meaningful length where home methods top out at a half size. If home methods haven’t solved the problem after a week of consistent effort, a cobbler visit is the logical next step — and the cost is usually very affordable compared to buying a new pair of shoes.
Tight leather shoes don’t have to stay tight. With the right method for your specific problem — whether it’s the toe box, the width, the heel, or general stiffness — and a little patience over a week or two, most leather shoes can be made genuinely comfortable at home. Start gentle, condition consistently, and your shoes will reward you with a fit that improves every single time you wear them.
Leave a Reply