
Breaking in leather shoes doesn’t have to mean suffering through blisters and sore feet for weeks. With the right approach from day one, you can get your leather shoes comfortable far faster — and without the pain most people assume is unavoidable. This guide gives you a step-by-step plan, targeted tricks for every problem area, and everything you need to know to break in leather shoes the smart way.
Why Leather Shoes Need Breaking In
Genuine leather — especially full-grain and top-grain leather — is dense, stiff, and structured when new. The shoe is built around a generic foot-shaped mold called a last, not around your specific foot. Your heel width, arch, toe shape, and instep height are unique to you. Until the leather softens and molds to those specific contours, there will be friction — and friction causes pain.
The break-in process is simply the leather softening, flexing, and gradually conforming to your foot’s exact shape. The result on the other side of that process is a shoe that fits like nothing else — genuinely molded to you, more comfortable with every wear, and improving for months after purchase.
The goal of this guide is to get you to that point as quickly and painlessly as possible.
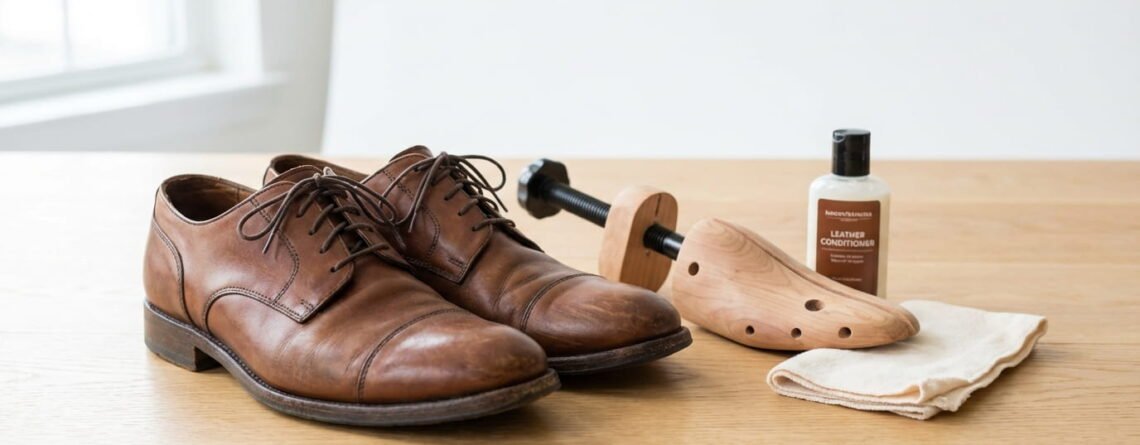
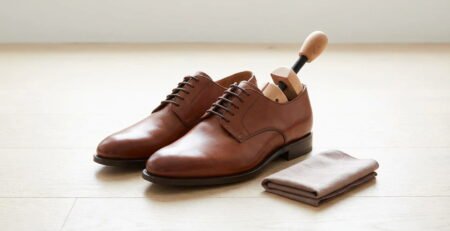
What You’ll Need
Before the First Wear — Prepare the Shoes
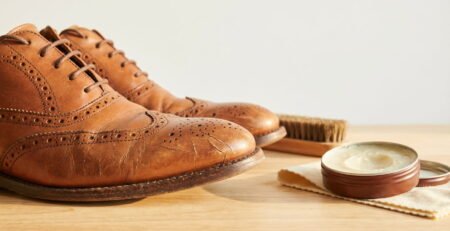
Condition the Leather Before You Ever Put Them On
The single most effective thing you can do to reduce break-in pain is to condition the leather before the very first wear. Apply a quality leather conditioner generously across the entire upper — heel counter, toe box, sides, and tongue — using a soft cloth and circular motions. The conditioner penetrates the leather fibers and softens them from the inside out, making the leather noticeably more pliable before it ever touches your foot. Let it absorb for 15 to 20 minutes, then buff off any excess. This one step alone can reduce break-in discomfort by a meaningful amount from the very first session.
Identify Your Problem Areas Before Wearing
Put the shoes on briefly — just for a minute or two — and note exactly where they feel tight or uncomfortable. Is it the heel counter? The toe box? The sides across the ball of your foot? Knowing your specific pressure points before you start lets you target those areas with protective measures and stretching techniques rather than treating the whole shoe generically. Every foot is different and every shoe fits differently — a personal pressure-point map saves time and prevents unnecessary blisters.
Apply Blister Protection to Vulnerable Spots
Before every wear during the break-in period — especially the heel — apply protection to the areas you identified. A blister plaster or moleskin pad stuck to the back of each heel is non-negotiable for most people in new leather shoes. Apply a thin layer of petroleum jelly or an anti-friction balm like Body Glide to any other identified pressure points. These measures don’t fix the tightness — they prevent the friction from those tight areas from causing painful blisters while the leather softens over time.
The Break-In Plan — Week by Week
Your Four-Week Break-In Schedule
Targeted Tricks for Every Problem Area
Heel Blisters and Rubbing
The heel counter is the stiffest part of most new leather shoes and the most common source of blisters. Before each wear, stick a blister plaster or moleskin pad to the back of both heels — not the shoe, but your skin. Apply petroleum jelly over the top for extra friction reduction. Inside the shoe, self-adhesive heel grips — small foam or gel pads that cushion the heel counter — reduce rubbing significantly and are worth having for the first two weeks. The heel counter softens faster than most other areas with wear, so this problem typically resolves sooner than toe box tightness.
Tight Toe Box
A tight toe box that squeezes or pinches your toes responds well to a shoe stretcher used overnight — insert it into the shoe, expand it to firm resistance, and leave for six to eight hours. Alternatively, the thick sock method works well here — wear the thickest socks you own with the shoes for 30 minutes at home to gently push the toe box outward from the inside. Applying conditioner specifically to the outside of the toe box before wearing softens that area and makes the leather more responsive to your toes’ natural shape.
Pressure Across the Ball of the Foot
Width tightness across the widest part of the foot — the ball — is one of the more persistent break-in challenges. A width-specific shoe stretcher with spot-stretching plugs is the most effective targeted tool for this area. A thin cushioned insole or gel pad placed under the insole can also relieve ball-of-foot pressure during the break-in period. If width tightness doesn’t ease after two to three weeks of consistent wear and stretching, the shoe’s last may simply be too narrow for your foot shape — a cobbler can stretch the width professionally.
Instep Pressure
If the tongue presses uncomfortably on the top of your foot, keep the laces looser than you normally would during break-in sessions. Apply conditioner to the tongue area specifically to soften it faster. A Derby shoe’s open lacing allows more instep accommodation than an Oxford’s closed lacing — if instep pressure is a persistent problem regardless of the break-in stage, switching to a Derby style may be the longer-term solution.
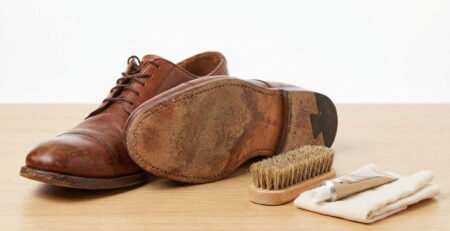
Aching Leather Soles
Hard leather soles provide little cushioning compared to the soft-soled shoes most people wear daily. The ache across the ball of the foot in the early weeks is normal as your feet adjust. A thin cushioned insole — placed under the existing insole rather than replacing it — adds comfort during the transition without permanently altering the shoe’s fit. The leather sole itself becomes more flexible and comfortable after 10 to 15 wears as it develops its natural flex point.
Six Tricks That Speed Up the Process
The Spoon Trick for Heel Rubbing
Take a smooth metal spoon and rub the inside of the heel counter — the back inner surface of the shoe — firmly back and forth for 60 seconds. The friction from the spoon warms and slightly softens the leather in exactly the spot that causes most heel blisters. Do this before the very first wear. It takes one minute and genuinely reduces heel rubbing from the very first session. Cobblers and experienced shoe wearers have used this trick for decades.
The Thick Sock Method
Wear the thickest socks you own — wool hiking socks or doubled-up cotton socks — with your new leather shoes for 20 to 30 minute sessions at home. The extra bulk pushes outward against the leather in all directions simultaneously, gently stretching and softening the leather while your foot’s heat makes it more pliable. This is the simplest and safest method that requires zero equipment and costs nothing.
The Hairdryer Method
Put on thick socks and your new leather shoes. Using a hairdryer on medium heat — never high — warm a specific tight area for 20 to 30 seconds while keeping the dryer moving constantly. Flex your foot naturally while the leather is warm — curl your toes, bend your foot up and down. Keep the shoes on until the leather cools completely. The heat softens the leather and the movement of your foot while it’s warm molds it to your shape. Apply conditioner to the heated areas immediately afterward. Use this method sparingly — no more than once every 24 hours per area — and never on suede.
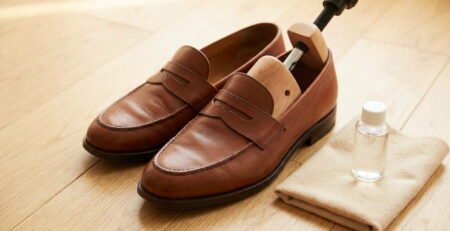
Shoe Stretcher Overnight
For targeted tightness — especially in the toe box or across the width — insert a wooden shoe stretcher, expand it to firm resistance, and leave it in overnight for six to eight hours. For better results, apply leather conditioner or shoe stretch spray to the tight area before inserting the stretcher. The sustained outward pressure while the leather is softened by the conditioner gives a more significant and lasting stretch than wearing alone. Two or three overnight sessions are usually enough to resolve persistent tight spots.
The Conditioner Soak and Wear Method
Apply a generous coat of leather conditioner to the entire shoe — especially the heel counter and toe box — and let it soak in for 30 minutes before putting the shoes on. The deeply softened leather is at its most receptive and molds to your foot more readily during the wear session that follows. Wear with thick socks for maximum effect. Repeat every other day during the first two weeks for noticeably faster softening across the whole shoe.
The Newspaper Stuffing Method
Each night after wearing your shoes, stuff them as firmly as possible with tightly rolled or balled-up newspaper and leave overnight. The sustained outward pressure provides gentle overnight stretching while the shoes rest. This works as a passive supplement to other methods — it won’t transform an uncomfortably tight shoe on its own, but combined with daily wearing and conditioning it contributes meaningfully to the softening process.
Break-In Methods at a Glance
| Method | Time Required | Best Problem Area | Safe for Suede? |
|---|---|---|---|
| Conditioner before first wear | 15 to 20 minutes | All areas — full shoe softening | Yes — use suede conditioner |
| Blister plasters and balm | 2 minutes per wear | Heel and any friction point | Yes |
| Spoon trick | 60 seconds | Heel counter specifically | Yes |
| Thick socks and wear | 20 to 30 minutes daily | General all-over tightness | Yes |
| Hairdryer method | 20 to 30 minutes | Specific tight spots — fast | No — smooth leather only |
| Shoe stretcher overnight | 6 to 8 hours | Toe box and width | Yes — with stretch spray |
| Conditioner soak and wear | 30 minutes plus wearing | All areas — accelerated softening | Yes — use correct conditioner |
| Newspaper stuffing overnight | Overnight — passive | General mild tightness | Yes |
When Pain Means Poor Fit — Not Just Break-In
Most break-in discomfort improves progressively with each wear. If your shoes are getting noticeably more comfortable week by week, that’s the break-in process working exactly as it should. But if the pain stays the same — or gets worse — after two to three weeks of consistent wearing and targeted stretching, the shoes may simply be the wrong fit for your foot.
Signs the shoe is the wrong fit rather than just breaking in:
- Your toes curl, go numb, or feel crushed from the very first wear with no improvement over time
- The shoe creates painful pressure in exactly the same spot every single wear with no reduction
- The width feels completely rigid with zero give — even after conditioning and stretching
- You develop recurring open blisters in the same spot despite protection
- The shoe slips significantly at the heel — too loose in the heel means too small overall
✔ Break-In Habits That Work
- Condition before the very first wear
- Start with short home sessions and build gradually
- Always use blister protection during early wears
- Insert cedar shoe trees after every single session
- Apply the spoon trick to the heel counter before day one
- Combine multiple methods for faster results
- Condition again at the end of each week
- Stop and rest if open blisters develop
- Be patient — three to four weeks is normal
✘ Mistakes That Make It Worse
- Wearing new leather shoes all day immediately
- Skipping blister protection for the first few wears
- Using a hairdryer on suede or patent leather
- Forcing through open blister pain
- Storing without shoe trees during break-in
- Skipping conditioner and relying on polish alone
- Assuming all pain after four weeks is still break-in
- Using excessive heat to speed up softening
Frequently Asked Questions
How long does it take to break in leather shoes without pain?
With the right preparation and methods, most people get through the genuinely painful phase of breaking in leather shoes within one to two weeks — significantly faster than the three to four weeks that results from just wearing them cold with no preparation. The key steps that make the biggest difference are conditioning before the first wear, using blister protection consistently, and doing short home sessions before long outdoor wears. The shoes continue improving beyond that initial period — full-grain leather keeps softening and molding for up to three months — but the acute discomfort resolves much sooner when you approach the process intentionally.
Do all leather shoes need breaking in or just some?
Almost all genuine leather shoes require some break-in period — the denser and higher-grade the leather, the longer the process. Full-grain leather shoes have the longest break-in period but ultimately become the most comfortable. Top-grain leather breaks in a little faster. Genuine leather and corrected-grain leather soften more quickly but don’t mold to the foot with the same precision. Synthetic and bonded leather shoes often feel comfortable immediately — because the material doesn’t have the density to resist — but they also don’t improve the way real leather does. The break-in is the beginning of a long relationship with a quality shoe.
Is it normal for leather shoes to hurt at first?
Yes — some discomfort during the first few wears of genuine leather shoes is completely normal and expected. The heel is the most common source of early pain, followed by the toe box and sides. What’s not normal is severe pain that makes the shoes unwearable from the very first moment, pain that shows no improvement after two to three weeks of consistent wear and targeted treatment, or toes that go numb or curl from the fit. Discomfort that gradually eases with each wear is break-in. Pain that stays constant or worsens suggests a fit problem that conditioning and stretching won’t solve.
Breaking in leather shoes without pain is entirely achievable — it just requires a little preparation and patience rather than suffering through it. Condition before you start, protect your feet throughout, build up wearing time gradually, and target specific tight spots with the right tools. Do all of that and you’ll reach the comfortable side of the break-in process faster than you might expect — with a pair of shoes that will keep rewarding you for years to come.
Leave a Reply